![How to turn the internal torx screw of a Dyson DC35 hoover head by immobilising the cog that it sits in [with a pen]](https://cusack.eu/wp-content/uploads/2020/12/internal-torx-screw-dyson-dc35-head-1092x500-1-1024x469.jpg)
How to fix the motorised head of a Dyson DC35 handheld hoover that spins and then stops… while watching football
Since it’s Christmas, my gift to you is this post I’ve been meaning to write for ages about fixing the head of a Dyson handheld vacuum cleaner (DC35). It’s pretty easy, and even as a complete amateur I managed it in about 15 minutes while watching football on TV, with only the small torx screwdriver being at all specialised in terms of necessary tools.
Which Dyson head do you mean?
I mean the motorised head — sometimes also called a power head, motorhead, or turbine head — of the Dyson DC35 handheld hoover/vacuum cleaner, illustrated below.

What DC35 motorised-head problem are you talking about?
This Dyson head (and perhaps others?) has a problem where the motorised brush will at first start spinning when the trigger is pressed but then stop spinning again after a few seconds. The reason for this stop-start, temporary, intermittent spinning is that hair gradually works its way into the machinery at either end of the tube on which the spinning brush is mounted, which ultimately causes the whole thing to grind to a halt.
This is different to the problem of just having hair wrapped around the spinning brush tube itself, which happens fairly frequently. You can easily pull out this hair when it is affecting performance, maybe using a scissors to cut through tough bits, but it doesn’t cause the more serious issue of stopping the brush from spinning.
What tools do I need to fix stop-start spinning on the Dyson DC35 head (while watching football)?
The only tools you’ll need are:
- A coin, to open the side and remove the spinning brush tube
- A fairly standard Philips/crosshead screwdriver, to remove the outer bar on the underside
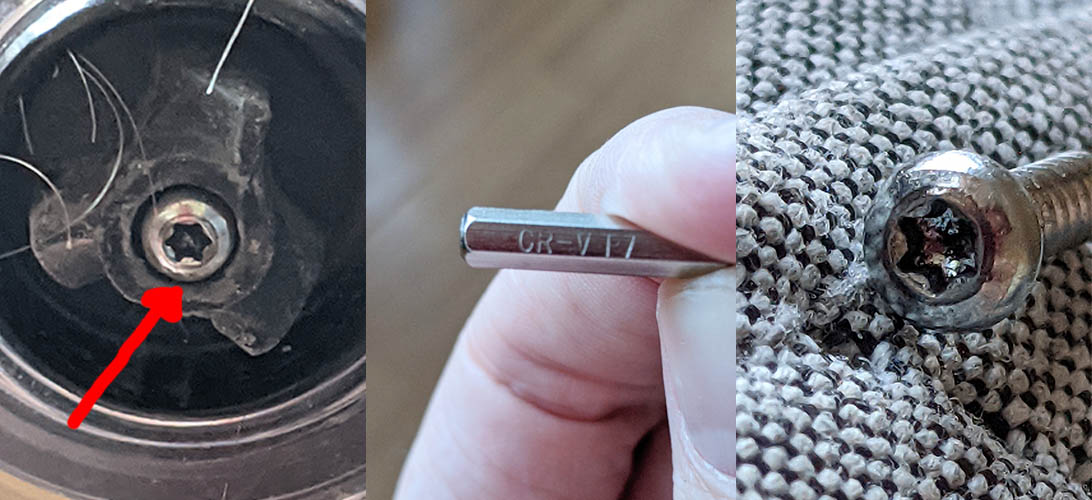
- A small torx (six-pointed star) screwdriver, to remove the screw in the centre of the cog that drives the spinning brush tube (CR-VT7 size)
- Some small round-nose pliers, to pull out the cog
- A football match to watch: even though it was quite distracting, I would personally recommend Liverpool’s 7-0 thrashing of Crystal Palace, which is what I had on
Step 1: Remove the spinning brush tube
Very easy to do. Just use a coin — a UK pound is ideal but it really doesn’t matter — to unlock the cap on the side of the head, as illustrated below.
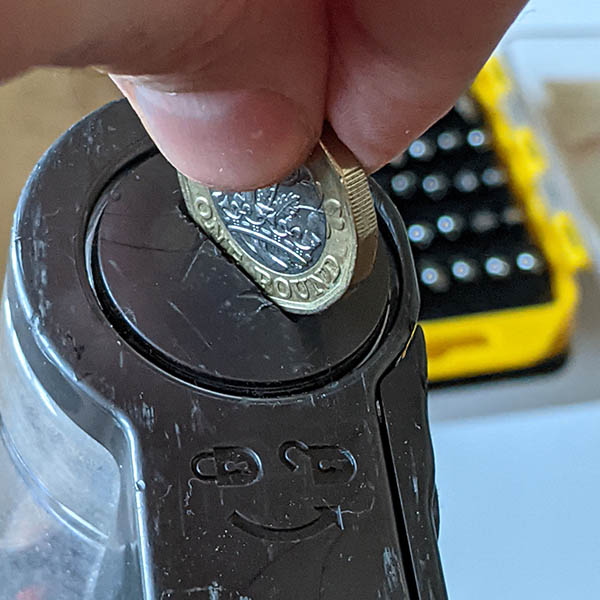 Then just slide the spinning brush tube out of the open side.
Step 2: Remove the front bar from the underside
Again very easy. Just use a fairly standard size Philips/crosshead screwdriver to remove the two screws that hold in place the bar towards the front of the underside of the head (front from the perspective of when you’re hoovering, though I think only one of the two plastic bars has crosshead screws anyway).
Step 3: Remove the torx screw from the cog driving the spinning brush
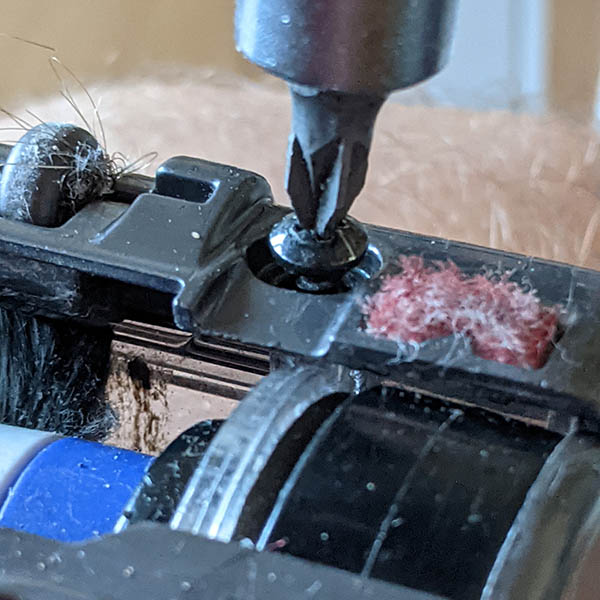
With the front bar removed, you should now have enough room to get a small/precision torx screwdriver (CR-VT7) into the barrel of the head and remove the central screw that secures the cog that drives the spinning brush (whose position is indicated by the red arrow in the image below).
This is slightly trickier just because it’s hard to manoeuvre in there, and because you need to prevent the cog itself from turning while you turn the screw. My way of doing this was by pressing a pen between the teeth of the cog while turning the screwdriver, as illustrated below.
![How to turn the internal torx screw of a Dyson DC35 hoover head by immobilising the cog that it sits in [with a pen]](https://cusack.eu/wp-content/uploads/2020/12/internal-torx-screw-dyson-dc35-head-1092x500-1.jpg) Step 4: Use some small round-nose pliers to pull out the cog driving the spinning brush
Step 4: Use some small round-nose pliers to pull out the cog driving the spinning brush
Someone more professional than me may have a better way, as this is a bit brutal and I guess it could damage the plastic cog if repeated too often, but… personally I removed the cog by getting hold of it with a pair of round-nose pliers (or long-nose/needle-nose) and then pulling it away.
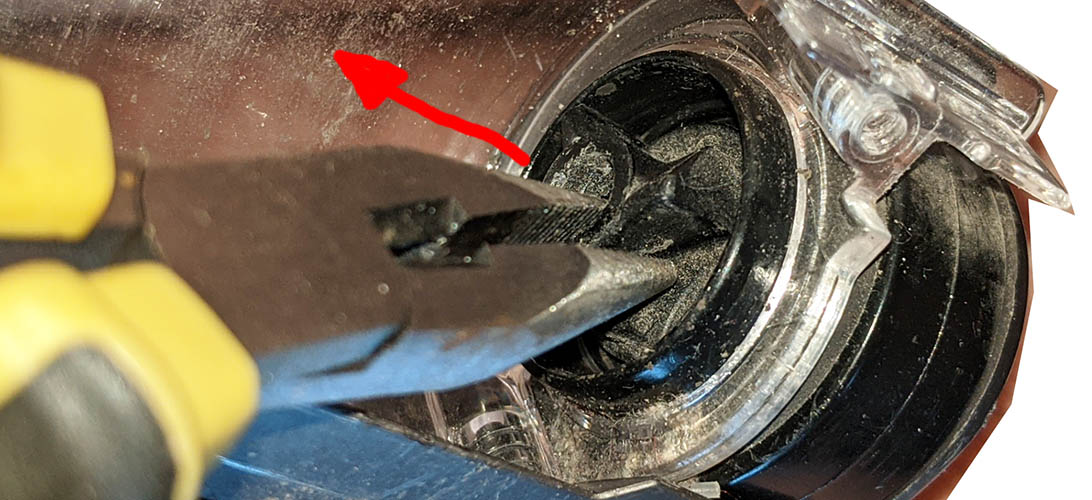
Just get one end into the space where the torx screw was and the other into a gap between two teeth on the cog, and then pull in the direction that you removed the screw (as shown below). With a bit of a tug, it will come out. I have done this twice now, and it doesn’t seem to have damaged the thread for the torx screw or the cog more broadly.
Step 5: Remove hair from behind the cog and from within the brush bar itself
If hair is indeed the problem, as it has been twice for me, when you have removed the cog driving the brush bar, you will find that the hub on which the cog turns is bunged-up with coils of hair. If you look at the open end of the purple brush bar, you will see the same thing (see below). Together, these two hair-jams are responsible for stopping the motorised head of your Dyson DC35 from spinning.
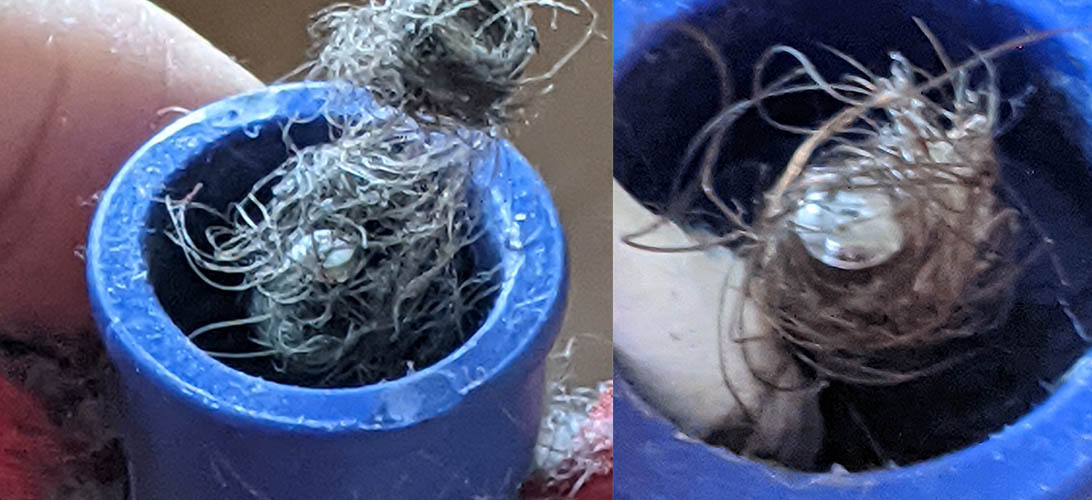 Removing the main coils of hair is fairly easy, as there will be plenty of them if they are managing to stop the brush bar from spinning. But I would recommend using a cotton bud (Q-tip) to get absolutely everything out and save yourself having to do this again so soon (as shown above right). The process is basically the same for both the inside of the brush bar and the area behind the cog that you removed earlier.
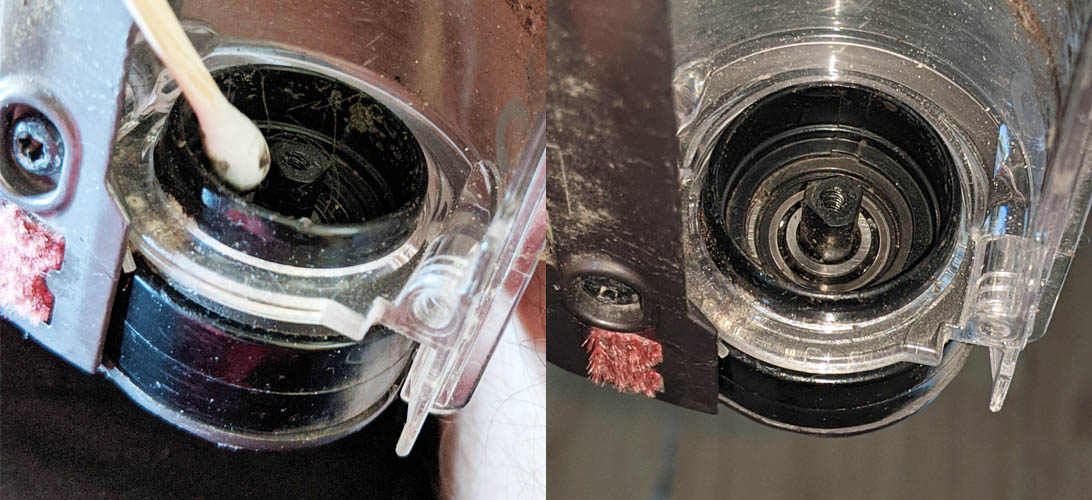
Step 6: Clean behind the cog and inside the open end of the brush bar
This may be optional, as really it’s the big stuff that makes a difference, I imagine. But while you’re there, maybe just use a cotton bud (Q-tip) — personally I put rubbing alcohol on it to pick up more grime — to clean out all the dirt inside both of the areas from which you have just removed coils of hair: behind the cog and in the end of brush bar where the axle is exposed, which should leave them looking a bit like this…
 Step 7: Put it all back together again
That’s it really. Now just do everything in reverse: push the cog back into the casing, screw it down with the torx screw, put the spinning brush bar back in, close the side with a coin, and you’re basically ready to see if it worked.
Step 8: Hoover to your heart’s content while watching the next match…
Press the trigger and see what happens! I’ve done this twice and it worked both times. If that’s true for you, that’s great news, as you can now move on to Southampton vs Manchester City (as shown below)!

